Life is an Adventure...
  • Home
  • Crafting
    • Replicate and Duplicate
  • Cooking
    • Make it Yourself! >
      • Recipe Cards
  • Dancing
  • Photos
  • Travels
  • Research

Seniors '11???

6/23/2011

2 Comments

 
It really is true - they DO grow up so fast!!

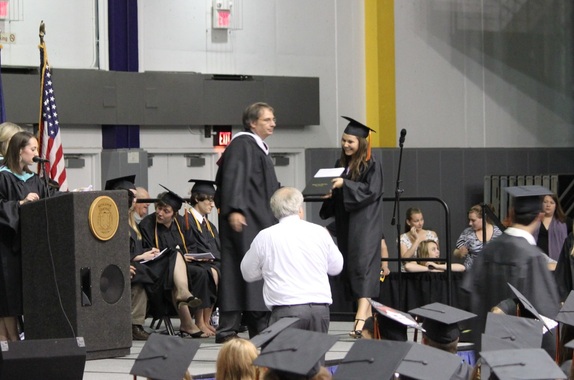
Tonight my "little" cousin, Alex, graduated from high school!  So proud!! :)
Picture
Picture


Adorable... <3

Picture
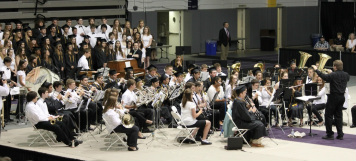
The band played a lil' medley from Mary Poppins that was just lovely!  

And of course the choir gave us their rendition of "Like an Eagle" - which I still remember all of the words to... sadly... (They did a wonderful job... it's just SUCH a cheesy song...)

Picture


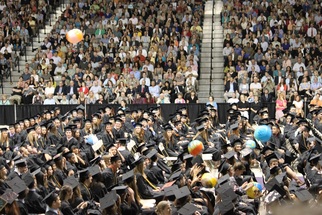
And what's a high school graduation without a few beach balls flying around?! 

Picture
Great family picture!!!
Picture
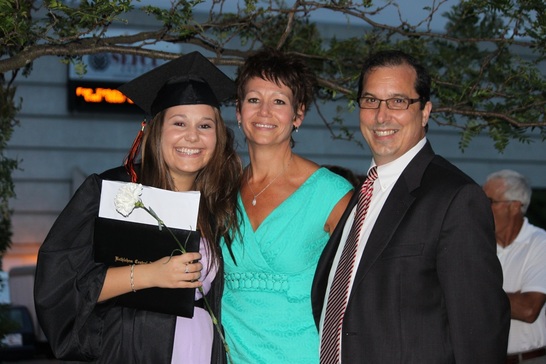
Alex, Aunt Kathy, and Uncle Dan
(Unfortunately, the rain kind of prevented us from taking too many pictures after the ceremony... love how that one turned out though!)


I can hardly believe how time has flown...

I feel like just yesterday we were here:
Picture
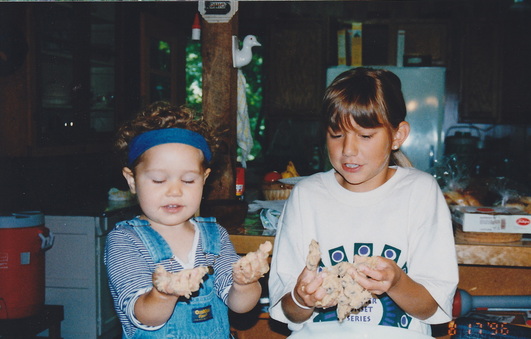
(Too stinkin' adorable, huh?)

And then all of a sudden - (this is where I blinked) - we got to this!
Picture

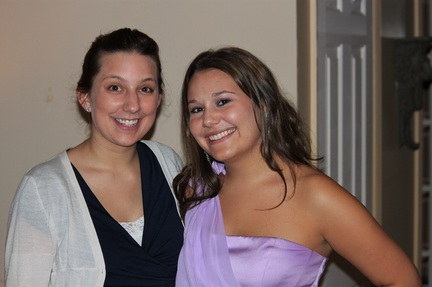
Pretty soon we'll be packing her up for college!  (She's going to study Pre-Veterinary Medicine - totally makes sense once you've been introduced to her zoo of pets!)

Good luck with everything, my beautiful cousin!!  So proud of you!!
Picture
2 Comments

Window valance for the living room!

6/21/2011

2 Comments

 
Panel curtains purchased for fabric:  1
Number of seams ripped out:  16
Miscalculations discovered after cutting occurred:  3
Number of different colored stripes that don't always line up:  4
Additional inches of valance I wish I had:  20

Creating your own home window decorations?  a HUGE pain in the a-

uhhh.... I mean.... PRICELESS!!!!


Ok, ok, ok.... let's start at the beginning... 

You know how I have that HUGE window in my living room?

(Reminder:)   
Picture
Even with all of the furniture moved in, it still felt a little toooo... naked... which translates to boxy and awkward... 

Curtains were and obvious solution but good luck finding a set that will complement a window that is 93 inches long and 47 inches high!  You can't just throw a long panel on either side - they would be too far apart to really connect.  So I was thinking that maybe I could throw up 3 or 4 panels - 1 on either side and 1 or 2 in the center - and maybe trick everyone into thinking I actually had 2 appropriately sized windows instead of my fishbowl window!  (Don't get me wrong though - I LOVE this window... I have a pretty view of the trees and it lets in tons of natural light during the day.)

Some kind of simple little window topper seemed like an appropriate solution - now all I had to do was find one!  (Or some fabric to fake my way through making a set...oh boy...)

Enter: Target.

The girls and I were out shopping for new apartment goodies and so it was only natural that we stopped by the curtain section.  Which, unfortunately, left something to be desired in the window valance department - 1. they could not accommodate my excessive window width, and 2. they were all solid colors (boooorrrrrinnnnggggg).

But! They did have this: 
Picture
(Image taken from Target.com)
Now, I know that you're thinking - but that's a panel!  Right.... which is also just a HUGE rectangle of fabric, yes? AND it's cheaper than just buying raw fabric!  (My engineer-gears started turning... and luckily I had my 2 engineer girls with me who's own engineer-gears prompted the "you could definitely cut this up and make something!")  

I, of course, agreed and promptly purchased one panel of the fabric (this photo doesn't do it justice, by the way - the green stripes have more vivid colors and contrast nicely with the taupe background).

The overall plan was to create a valance that would taper to be a little longer on either side of the windows - hopefully just framing the window a little and softening the "boxy" feel of the whole set up.  In my head, this worked out as just a rectangular valance with two triangular (ok, maybe "trapezoidal" is actually more accurate) sections on each end.

My project started with a whole lot of calculations and math.  And a lot of spontaneous changes and alterations.  Forgive me for not making a DIY tutorial for this - maybe some day but, to be honest, I'm not entirely sure I could explain it...

I mean, if you can follow my thought process?  More power to you...
Picture
But the gist of the project?  I started by ripping out all of the hang-tabs and the hems of the original panel curtain...
Picture
And then brought out my handy-dandy rotary cutter to slice up my pieces!
Picture


Of course, it wasn't until AFTER these first few cuts that I realized I was going to end up with two identical (left side) tapers - not the mirror images that I actually needed...

(@#$grumble,grumble%^&#...)

Fine. Re-measure, re-cut, and then come to terms with the fact that I would now have less material for my rectangular center - I had planned this to the T (well obviously there was faulty planning...) so that it would use just about the entire panel.  So, now I would have less ruching than I originally planned for and ugh!  Not happy!

But whatever, the show must go on... Act III: Hemming and Stitching. 
Picture


I ironed all of my hems first (this was actually the bulk of the project's time commitment but was WELL worth it) and then pinned them before I started sewing.

Picture
I'll spare you the details on having to piece together my remaining pieces because of my previously mentioned cutting mishap...  

Once I'd finished them, I really wasn't sure about how it all turned out - it just looked like such a disaster sitting on my floor.  But I was determined and refused to just fold them up and hide them away.  At the very least, these babies were going to hang at least until I had the motivation to come up with a new plan and try again.

To my (very excited) surprise, once I got them mounted over the window, I absolutely loved them.
Picture
Cute, right??? 

(please disregard my mobile that is so selfishly in the way... there was already a hook in the ceiling and I didn't know where else to put it...)

Overall, I'm really happy with how my valance came out - I'm thinking that if I had been able to make it longer, it would have been TOO ruched... so maybe my sewing-muse (I've named her Wilma) was just trying to use a happy accident as re-direction? :)

It also helps that I have master-sewing Mom's seal of approval, too... 

Now, I just have to figure out what the next project will be.... Any suggestions?  Anyone else about to tackle some curtains? 
2 Comments

River Street Festival!

6/18/2011

2 Comments

 
The official sign of summer! (Well... one of them anyway!) 

Rob was visiting so we decided to make a day of it!  With all of River Street blocked off, the festival is jam-packed with activities - it's the perfect way to spend a Saturday afternoon!  
Picture
There are tons of food vendors (BBQ, fried dough, lemonade stands, ice cream, kettle corn... woo hoo!) and all kind of live music...


(We ran into Kate, Katie, and John listening to some sweet jams in Monument Square!)
Picture
Picture
                            ...and crafting vendors!!!
Picture

(Luckily I had Rob there to keep me from being blinded by crafted adorableness and buying everything in sight!)

There was even a guy there throwing pottery!
Picture
But my all-time favorite part??  The sidewalk paintings!  Here are a few of our favorites...
Picture
Picture
(Quick break for some lemonade...)
Picture
Ok, sorry... back to sidewalk art!
Picture
Picture
Picture
Awesome, right??

After we voted for our favorites, Rob and I took our lemonade and some kettle corn down to the riverfront for a bit to unwind a little (and spoil our appetite for dinner, of course).
Picture
I like to think we look pretty good together... :)
Picture
(and I'm pretty sure Rob is the best self-photographer I've ever met...)

Amazing day... <3
2 Comments

Glass Candle Votives - how many times is a charm, again?

6/13/2011

4 Comments

 
Unpacking/organizing/reorganizing the new apartment + studying for my qualifier exam + research + the tempting first days of summer = neglected crafting :(

The one little project I did have time for was these adorable glass votives!
Picture
I had the glass stones and the plain votives from another project and when I brought out my hot glue gun for a little home repair, I had an idea!

I posted a little tutorial here (although it's pretty straight forward!).

I won't lie though, it wasn't as easy-breezy as I thought it was going to be!  I started off with a low-temp hot glue gun - epic fail... I came back the next morning to find 5 or 6 pebbles had fallen off and were laying on the table.  As I was re-attaching those, more were falling off.  (You know, the kind of thing that could bring you to tears when this simple little craft was supposed to give you a break from the rest of your hectic life).

So I switched to a high-temp hot glue gun, which was definitely an improvement but still had a few loose-stone issues but I eventually figured it out...  (Hence, the need for the little tutorial!)

Picture
Aren't they just perfect?  

I love the way the light shines through the stones out onto the table, too!


Once I'd gotten the system down, and realized how cozy these could make the apartment, I decided Kate and Katie needed some too...


The three of us have just moved out of our shared apartment and given that we all love candles, it just seemed fitting that we each have them.  I ran out of votives so I was only able to make them each one but once I have a change to pick up some more, I'll be sure to complete the sets!  Although, two each might not be enough either... ;)

Picture
(photo from Katie's blog!)
Katie wanted her's to be all clear stones - very classic and elegant...  :)

She posted them on her blog, Lucky Number 21, as well!  She blogs about her and John's apartment and all of the DIY that goes into it! - Definitely worth checking out...

Picture
(courtesy of Kate's phone)

And Kate got an orange one!

(I think she probably got the best picture out of all of us...)


As you can tell, all three of us were in love with the spray of light it gave out on the tabletop!!  

4 Comments

There's nothing like a GOOD manicure...

6/12/2011

1 Comment

 
Ok... I must admit that occasionally I do like to spoil myself with a little primping... I figured that pre-California trip was a good time to get a manicure (and pedicure, of course!).  

Now... the initial spa treatment rush is incredible!  But the worst part?  When it is all trampled in the heart-sinking crash...  (Ok... maybe it isn't exactly a tragedy... but every woman out there knows EXACTLY what I'm talking about!!!)

What's your story?  The it's-not-worth-it-because-they-always-chip-the-next-day?  The oh-crap-I-smooshed-them-on-the-seatbelt-as-I-was-leaving?  Or what about the I-could-have-sworn-they-were-dry-but-I-woke-up-with-my-bedding-imprinted-in-the-polish?  Yeah.... been there, done that... multiple times... 

What if I told you that this is me 13 days post-painting? 
Picture
Hard to believe right?  I don't have a single chip and they still have the day-one shine!  

My savior is Lindsay at the Lipstik Beauty Lounge!!!  I would HIGHLY recommend her to anyone (for nails and more!!).  Her secret?  Shellac!  

In summary?  It cures instantly (absolutely impossible to have any kind of "mushing") and it lasts for 2 weeks - which I've already seen for myself!!  (I figured no one needed to see photos of my feet but I also promise that the pedicure has survived equally as well!)  The manicure was a little more expensive than a regular, old polish job, but I think it's well worth it, especially considering it has lasted 10 times longer for me!
1 Comment
<<Previous
    Picture

    Alison "Ali" Rose

    Currently working on a Ph.D. in Environmental Engineering and all of the side projects that help get me through it!

    Follow Me on Pinterest

    Categories

    All
    Apartment
    Conferences
    Cooking
    Crafting
    Dancing
    Everything In Between...
    Have A Giggle
    Photos
    Presentations
    Research
    Travels
    Video

    RSS Feed

    Archives

    November 2014
    September 2014
    August 2013
    June 2013
    May 2013
    April 2013
    January 2013
    December 2012
    November 2012
    October 2012
    August 2012
    July 2012
    June 2012
    May 2012
    April 2012
    March 2012
    February 2012
    January 2012
    December 2011
    November 2011
    October 2011
    September 2011
    August 2011
    July 2011
    June 2011
    May 2011
    April 2011
    March 2011
    February 2011

    Creative Commons License
    My Life is an Adventure... by Alison Rose is licensed under a Creative Commons Attribution 3.0 Unported License.
Powered by Create your own unique website with customizable templates.