How to make your own Greek lettered shirts... |
|
As I mentioned, I've been on the production line of many (and might I add, adorable) t-shirts sporting a set of Greek letters. Most of them have been for my own sorority, Alpha Omega Epsilon, but I've also branched out a bit for some of my fellow Greeks.
Juuuuust about anyone can make a set of letters (I promise - it's really not bad!) but it can be a little daunting so here's a few steps to get you through it and a few variations to spice it up a bit!
Juuuuust about anyone can make a set of letters (I promise - it's really not bad!) but it can be a little daunting so here's a few steps to get you through it and a few variations to spice it up a bit!
Step 1: Gathering supplies
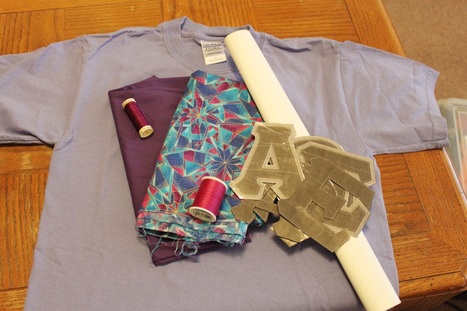
You will need the following:
* A SHIRT
~ you're choice of t-shirt (short sleeved, long sleeved, something in between...) sweatshirt, or whatever!
* FABRIC
~ if this is your first time, I would suggest something cotton-based as it's the easiest to work with
~ traditionally, you will use two colors/patterns - one for the main letter and one for the 'back' letter
~ as a gauge, a fat quarter will usually get you 4 sets of (3) large 'back' letters or 5 sets of (3) main letters
* WONDER UNDER
~ for those of you playing the home game, also known as "fusible web" or "heat 'n' bond"
* THREAD
~ in whatever coordinating (or contrasting) color(s) that you want!
~ go with an all-purpose or a cotton-based thread
* IRON (aaaand probably an IRONING BOARD isn't a bad idea either...)
* SCISSORS
* PEN/PENCIL
* SEWING MACHINE (and all the usual goodies that you need with it)
~ (don't have one? have no fear! you should definitely try a few of the simpler variations!)
* STENCILS
~ stop panicking... we'll go over how to make some...
Step 2: Prep Time!
Start by washing (and drying) your shirt and your fabric swatches as you would normally launder the shirts after they're made - this will help you avoid issues with shrinking and will help keep your letters smooth.
Making Your Stencils
I made mine by just scanning/photocopying a set of letters I already owned and then just cutting them out so I could trace around them. I've found this is the easiest and most reliable way (they are already the correct size, etc.). Before I cut them out, I covered the printed paper with clear contact paper so that they would be a little more durable and last longer.
The other option is to find a printable version online and follow the same process. Traditional Greek letters are 4 inches high (for the inner letter, 4.5 inches for the backing letter) but feel free to vary that if you'd like!
Either way, you will need a total of 2 stencils for each letter - one for the backing letter, and one for the main letter.
Step 3: Cutting Your Letters
Cut a piece of Wonder Under large enough that you can fit all of your letters - each (individual) letter will need to be contained on a continuous piece of Wonder Under. Also, be mindful of the pattern on your fabric and if you need the letters to all be facing "up" etc.
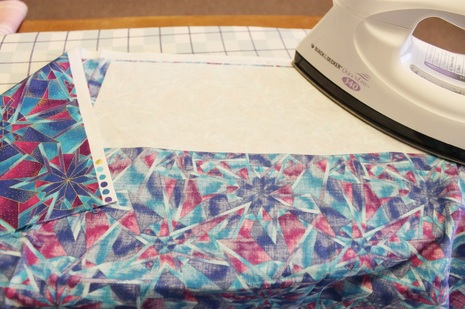
Iron the Wonder Under **rough-side down** on the **wrong-side** of the fabric!!
Iron the Wonder Under **rough-side down** on the **wrong-side** of the fabric!!
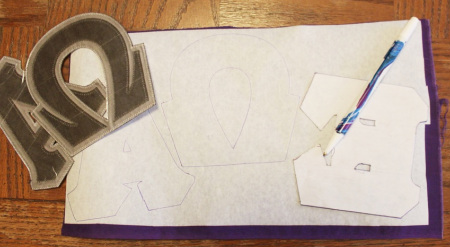
Trace your stencils *face down* on the Wonder Under paper - ie. the paper is the back-side of the fabric so make sure it's the back-side of your stencils as well (or else you'll end up with everything backwards...) Remember: if there is a specific pattern on your fabric that you're concerned about to arrange your letters accordingly.
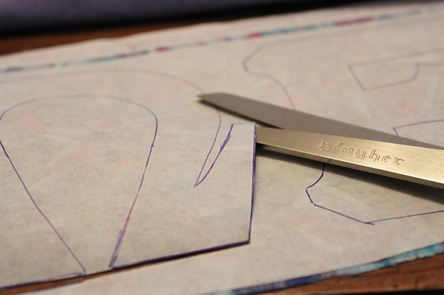
And then? Just cut them out!
Step 3: Assembly
Here you're going to iron the letters onto the shirt where you want to have them sewn down. Wonder Under to the rescue! It will help keep your letters in place (pins just aren't reliable enough...) and it will also give a little stiffness to the letters that will keep them looking smooth and neat.
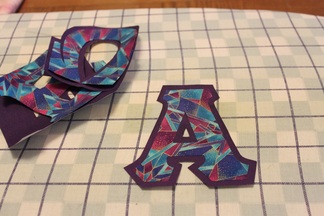
I usually start by ironing the small (front) letters onto the large (back) letters first and then ironing the set onto the shirt - although you can do it all in one step if that's your preference.
Pull the paper backing off of the front letters only. (Unless of course you wanted to iron the whole set to your ironing board... could be cute I suppose...)
Once you have them positioned on the larger letters, iron away! (cotton setting, no steam!)
Pull the paper backing off of the front letters only. (Unless of course you wanted to iron the whole set to your ironing board... could be cute I suppose...)
Once you have them positioned on the larger letters, iron away! (cotton setting, no steam!)
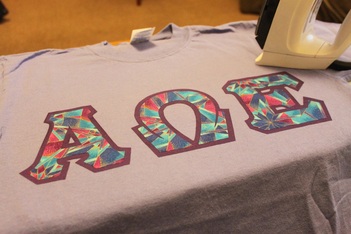
Then you can peel the paper backing off of the large letters, arrange, and iron them on your shirt!
I've found that 3"-3.5" from the collar of the shirt is relatively good placement.
Traditional letters are usually centered although you could really put them anywhere you want! Align them vertically! Tilted! On the back! Whateeeeeever you want....
I've found that 3"-3.5" from the collar of the shirt is relatively good placement.
Traditional letters are usually centered although you could really put them anywhere you want! Align them vertically! Tilted! On the back! Whateeeeeever you want....
Step 4: Sewing
Almost done! To sew the letters, you'll use a zig-zag stitch to run along the edges of each small and large letter. The stitch width and length is really up to your personal preference - practice on some scrap fabric to see what you like. I typically use about a 1/8" stitch width and a 1/16" stitch length.
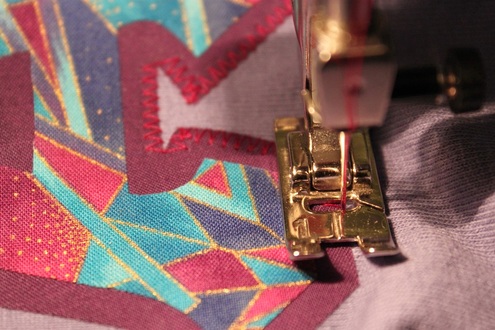
Use the edge of the fabric you're stitching on as a guideline for the outside edge of your zig-zag.
To knot the stitching at the beginning/end, you can either backtrack your first few stitches (sew forwards, backwards, and then continue forwards again) or I usually just move my stitch length to zero for the first few stitches.
And that's it! You're done!
Caring for your letters...
Generally? Machine wash cold, tumble dry low...
Do your best to remove them from the dryer ASAP so that they don't cool with the Wonder Under all wrinkled (it'll just stiffen that way... not totally tragic... just press with a warm iron again and you should be good to go...)
To be honest? The ones I make myself tend to last longer than any of the letters I've purchased - plus I seem to have MUCH neater stitching...
Variations!
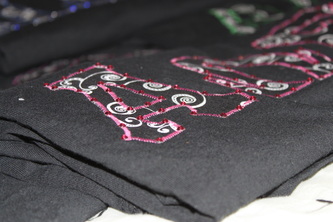
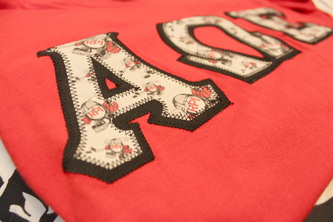
"Traditional" Greek letters can get creative on their own as you start play with patterned fabrics and color combinations, but why stop there?! Here are just a few ideas I've tried but feel free to experiment on your own! (And be sure to share your creations!)
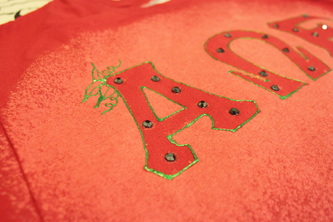
* Add a little bling with some rhinestones
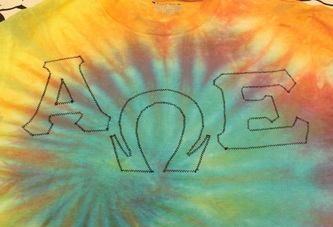
* Skip the fabric all together and just have an outline of the letters in stitching (see tie-dye example!)
* Plastic stencils + spray bottle of bleach = amazing! (another possible tutorial? I think so...)
* When in doubt? Accent with some puff paint! (see watermelon-themed bleach letters below!)
* Use iron-on transfers to create your own "fabric" - I made Puckman letters to wear to our hockey games!
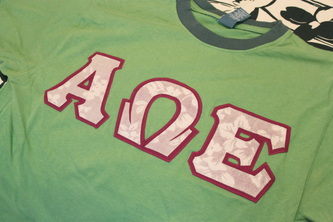
* A semi-sheer top fabric can add a cool effect (see Hawaiian-esque on the green shirt)
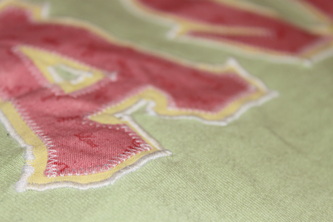
* Use a very small stitch length to outline in "silk stitch" (see pink/yellow letters on light green below)
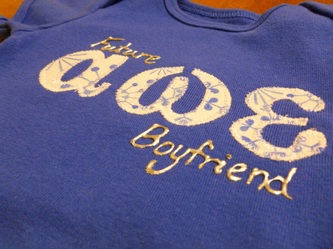
* Lowercase letters on a onesie are perfect for new babies of your Sisters/Brothers... :)
(more photos will be added as I continue to make them..)
Update: 7/24/2012 - Orders
I've had a few of you contact me to ask about ordering letters from me directly. I don't have an official business of letter-making, but I'm happy to try and help you out! - I know DIY isn't for everyone... Feel free to drop me a note using the contact form below if you'd be interested in discussing order options!
Update: 2/4/2016
I am now back in full force and sewing again! :)

